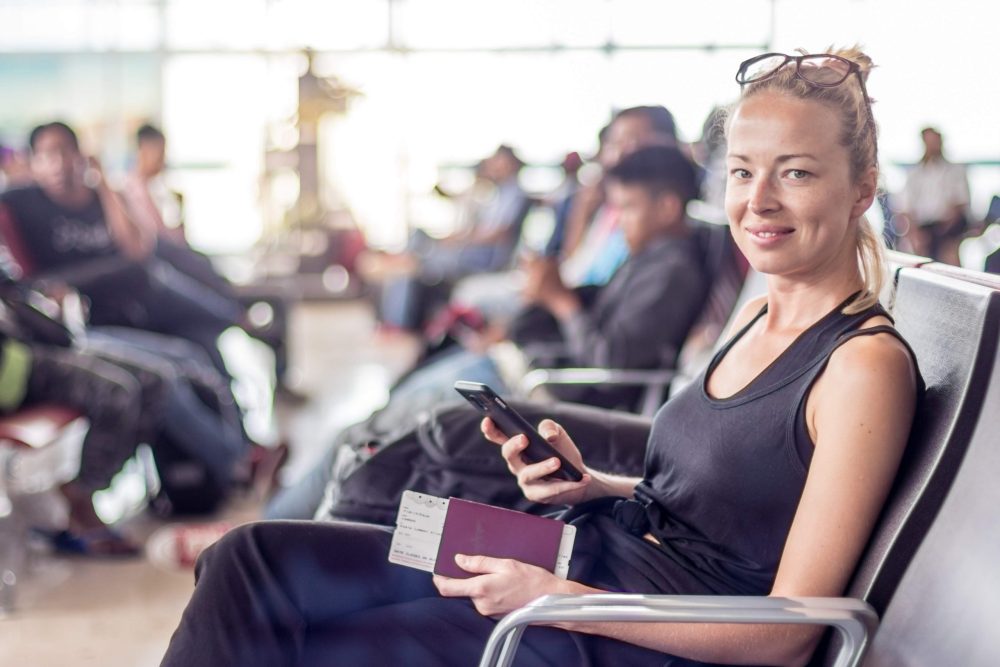
Welcome to Vietnam! The excitement of starting your journey in the vibrant, bustling hub of Ho Chi Minh City is a feeling like no other. From the incredible street food of District 1 to the poignant history of the Cu Chi Tunnels, a memorable adventure awaits. But before you can immerse yourself in the culture, you have one final hurdle: navigating Tan Son Nhat International Airport (SGN).
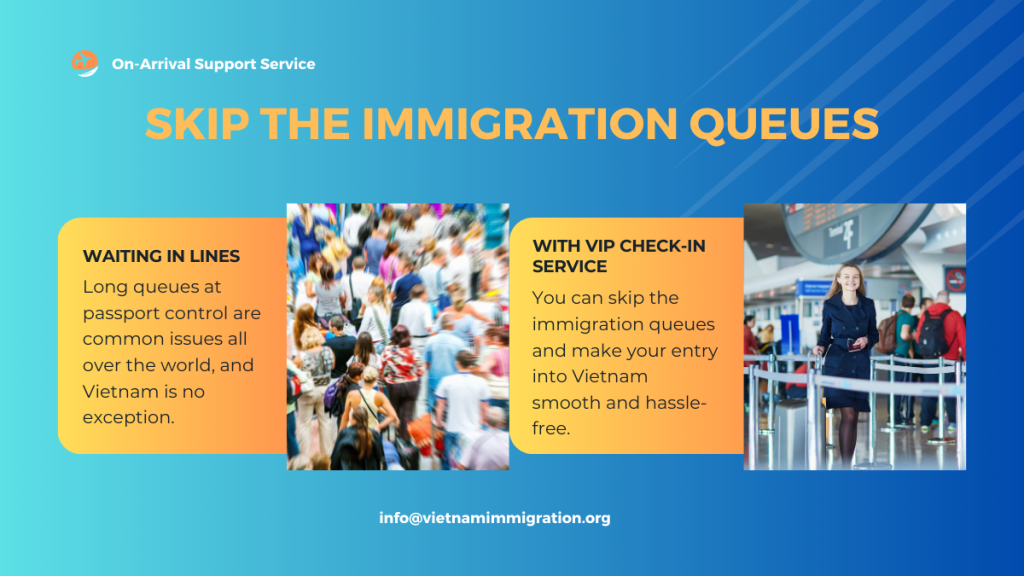
As one of Southeast Asia’s busiest airports, the arrival process can sometimes feel overwhelming, with long queues at immigration being a common challenge for weary travelers. You’ve planned your trip meticulously, and the last thing you want is for your first impression of this beautiful country to be one of frustration and endless waiting.
This guide is your expert companion, designed to ensure your arrival is smooth and stress-free. We’ll walk you through the standard process, but more importantly, we’ll show you how to sidestep the exhausting queues and chaotic bottlenecks that can turn the first hours of your trip into a frustrating ordeal. More importantly, we’ll introduce you to the definitive solution for a seamless arrival: using a Fast Entry at Tan Son Nhat Int’l Airport service to bypass the queues and begin your Vietnamese holiday with the speed, comfort, and VIP treatment you deserve.
What to Prepare Before Arriving at Tan Son Nhat Int’l Airport
A smooth arrival begins long before you land. Being well-prepared is the single most effective way to minimize stress. Before you even head to your departure airport, run through this essential checklist to ensure you have everything in order.
1. Passport & Visa: The Non-Negotiables
👉 Passport Validity: This is a critical point that trips up many travelers. Your passport must be valid for at least six (6) months from your date of entry into Vietnam. Immigration officials are extremely strict about this rule. If your passport has less than six months of validity, you risk being denied entry and sent back on the next flight.
👉 Blank Passport Pages: Ensure you have at least two blank pages in your passport for the visa and entry/exit stamps.
👉 Your Entry Permit (Visa):
E-Visa Holders: You must have a printed copy of your Vietnam e-visa. While some officials may accept a digital copy on your phone, a physical printout is the safest and most recommended option to avoid any technical issues.
Visa-Free Visitors: If you are a citizen of a country with a visa exemption agreement with Vietnam, your passport is your entry permit. Be sure to know the maximum number of days you are allowed to stay.
Visa-on-Arrival (VOA) Holders: You absolutely must have your pre-approved Visa Approval Letter. Without this letter, airlines will not allow you to board the flight to Vietnam. You will also need other documents, which we detail in the VOA section below.
👉 Digital & Physical Copies: It’s a wise travel practice to have photocopies of your passport’s information page and your visa/visa approval letter. Keep them separate from the originals. Additionally, save digital copies in a secure cloud storage service (like Google Drive or Dropbox) or in your email for easy access.
2. Trip Information & Accommodation Details
Flight Itinerary: Keep a copy of your return or onward flight itinerary. While not always asked for, immigration officials may request it as proof that you intend to leave the country within your permitted time.
Accommodation Information: You will likely need to provide the address of your first night’s accommodation on your arrival card. Have the name, address, and phone number of your hotel or guesthouse readily accessible. A screenshot of your booking confirmation is perfect.
3. Financial & Health Preparations
Currency: While you can exchange money at the airport, it’s a good idea to have a small amount of US Dollars (USD) or Vietnamese Dong (VND) on you, especially if you are getting a visa-on-arrival, as the stamping fee must be paid in cash.
Travel Insurance: While not a mandatory entry requirement, traveling without comprehensive travel insurance is highly discouraged. Ensure it covers medical emergencies, trip cancellations, and lost luggage.
4. Understanding Customs Regulations
To ensure a smooth passage through the final checkpoint, be aware of what you can and cannot bring into Vietnam.
👉 Currency Declaration: You must declare cash amounts exceeding US$5,000 (or its equivalent in other currencies).
👉 Duty-Free Allowances: You are generally permitted to bring:
200 cigarettes
1.5 liters of spirits
👉 Prohibited Items: Do not bring narcotics, firearms, anti-government materials, or pornographic materials into Vietnam.
👉 Medication: If you are traveling with prescription medication, keep it in its original packaging and carry a copy of your doctor’s prescription.
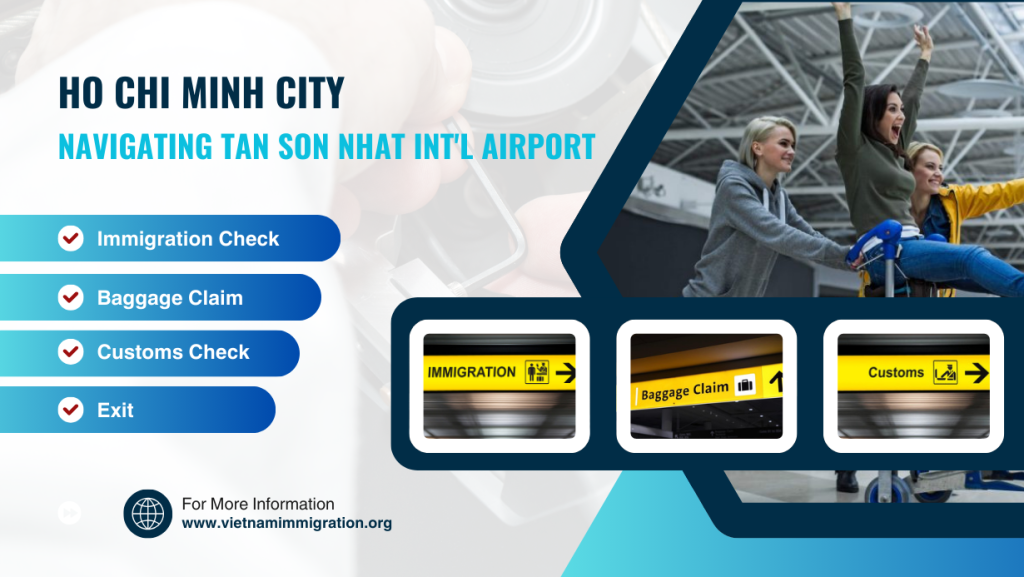
About Tan Son Nhat Int’l Airport (IATA: SGN, ICAO: VVTS)
Tan Son Nhat International Airport is the largest and busiest airport in Vietnam, serving as the primary gateway to Ho Chi Minh City and the southern region. It is located approximately 8 kilometers north of the city center. The airport consists of two main passenger terminals:
Terminal 1 (T1): Serves domestic flights.
Terminal 2 (T2): Serves all international flights.
As an international visitor, your entire arrival experience will take place in Terminal 2. It’s a modern, four-story building. Here’s a simple breakdown of the layout to help you visualize your path:
First Floor (1F): This is where you will deplane and enter the building. This floor houses the crucial Landing Visa / Visa-on-Arrival Counter and the main Immigration Hall.
Ground Floor (GF): After clearing immigration on the floor above, you will take an escalator or elevator down to the Ground Floor. This is where the Baggage Claim carousels and Customs Check are located. The arrival hall, where you can find SIM card vendors, currency exchange counters, and meet your pre-booked transport or our Fast Entry staff, is also on this level.
Other Floors: The upper floors (2F and 3F) are for departures, so you won’t need to access them upon arrival.
The airport provides free Wi-Fi (“FreeWifi TanSonNhat Airport” or similar), though it can be spotty during peak times. Signage is in both Vietnamese and English, making it relatively easy to navigate.
Steps to Navigate Tan Son Nhat Int’l Airport for E-visa Holders and Visa-Free Visitors
If you have your e-visa printout or are from a visa-exempt country, your arrival process is the most direct. However, “direct” doesn’t always mean “fast,” as you will join the main queues at immigration.
Step 1: Immigration Checkpoint
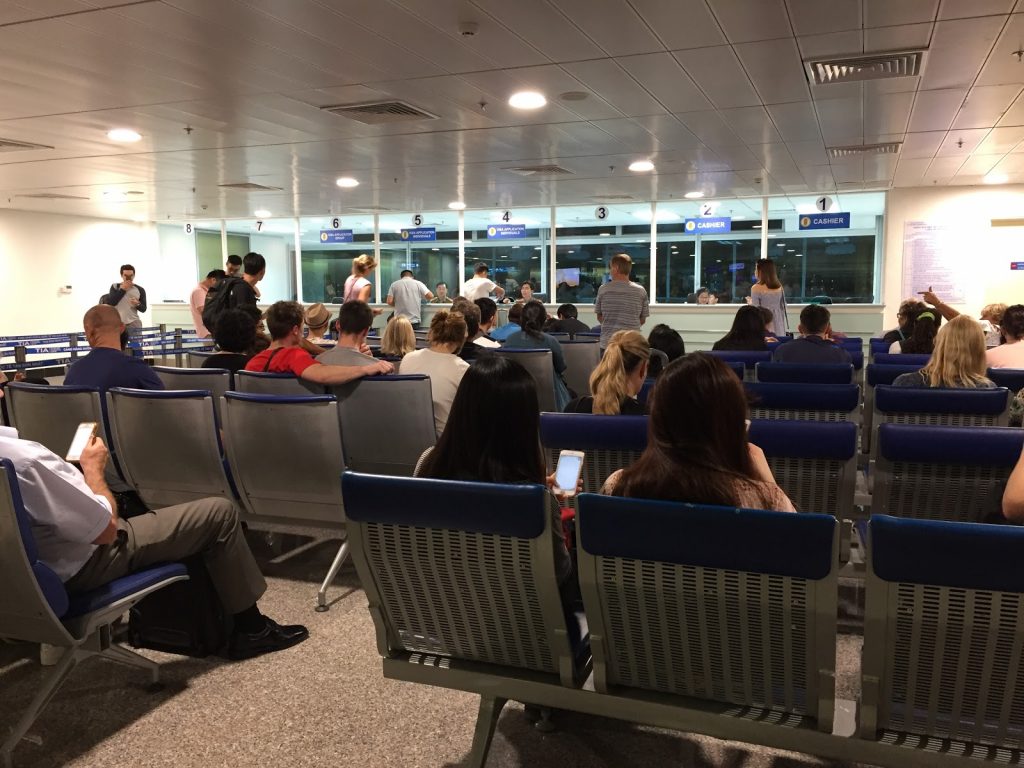
After deplaning, follow the signs for “Immigration.” You will be directed to the large immigration hall on the 1st Floor. This is often the most time-consuming part of the arrival process. Lines can be very long, especially if several international flights have landed at the same time. Wait times of 45-90 minutes are not uncommon during peak hours. When you reach the counter, present the officer with:
Your passport
Your printed e-visa (if applicable)
The officer will check your documents, scan your fingerprints, take a photo, and stamp your passport with an entry stamp.
Step 2: Baggage Claim
Once you have cleared immigration, proceed down to the Ground Floor. Look for the large screens that display arriving flights and their corresponding baggage carousel numbers. Find your flight and head to the correct carousel to collect your luggage.
Step 3: Customs Check
With your luggage, proceed towards the customs area.
Green Channel: If you have nothing to declare, you can walk through the Green Channel.
Red Channel: If you have items that exceed the duty-free allowance or require declaration, you must go through the Red Channel.
Step 4: Exit the Airport & Enjoy Your Trip
After customs, you will enter the main arrival hall. Congratulations, you are officially in Vietnam! This is where you can get a local SIM card, exchange currency, and find your way to your transportation into the city.
The Primary Challenge for All Travelers: Immigration Queues
While your process has fewer steps, the primary bottleneck is the Immigration Checkpoint. The long queues are a well-known issue and can be a draining start to your trip after a long flight. This is precisely the step where a Fast Entry at Tan Son Nhat Int’l Airport service becomes invaluable, allowing you to bypass this entire queue.
Steps to Navigate Tan Son Nhat Int’l Airport for Visa-on-Arrival (VOA) Holders
For VOA holders, there is a critical extra step at the very beginning of the process. You cannot go directly to the main immigration checkpoint.
Step 1: Landing Visa Counter (Visa-on-Arrival Counter)
As soon as you enter the immigration hall on the 1st Floor, look for the signs pointing to the “Landing Visa” or “Visa on Arrival” counter. It is located to the left before the main immigration passport control booths. Do not make the mistake of queueing in the main immigration line first. At this counter, you must submit your documents.
Checklist for Visa-on-Arrival Holders:
Original Passport (with 6+ months validity)
Visa Approval Letter (printed copy)
Completed NA1 Form: This is the official Vietnamese Visa Application Form. It’s best to download it here, print it, and fill it out before your flight to save time.
One (1) Passport-Sized Photo (4×6 cm): The photo should be recent and have a white background. It needs to be attached to your NA1 form.
Cash for Stamping Fee: You must pay the visa stamping fee in cash. The fee is typically US$25 for a single-entry visa or US$50 for a multi-entry visa. It is highly recommended to have the exact amount in US Dollars, although VND is sometimes accepted. There are no ATMs in this area.
After submitting your paperwork, you join a crowd of other travelers in the waiting area. This is often the most unpredictable part of the process. You must listen carefully for your name to be called out over a loudspeaker, often with varied pronunciations, which can be confusing and stressful. Missing your name means even more delays.
Step 2: Immigration Checkpoint
Once your name is called, you will collect your passport, now with the visa sticker inside. With your passport in hand, you can now proceed to the main immigration checkpoint to get your official entry stamp. If you are not using a fast-track service, you will join the regular queues here.
Step 3: Baggage Claim
Proceed down to the Ground Floor to collect your luggage from the designated carousel.
Step 4: Customs Check
Go through the Green or Red channel depending on what goods you are carrying.
Step 5: Exit the Airport
You have now completed all the formalities and can enter the arrival hall.
Note for Visa-on-Arrival Holders: Two Potential Delays
You face two significant waiting periods: first at the Landing Visa Counter, and then again at the Immigration Checkpoint. The wait at the Landing Visa counter can be unpredictable and chaotic, especially if many passengers on your flight are also getting VOAs. If you are missing any documents, like the photo or cash, this will cause further delays and stress.
Our Fast Entry Service is a comprehensive solution for VOA holders. Our team can handle the entire VOA process for you, ensuring your paperwork is prioritized and you avoid the queues at both the visa counter and the immigration checkpoint.
How to Skip Queuing at the Immigration Checkpoint at Tan Son Nhat Int’l Airport?
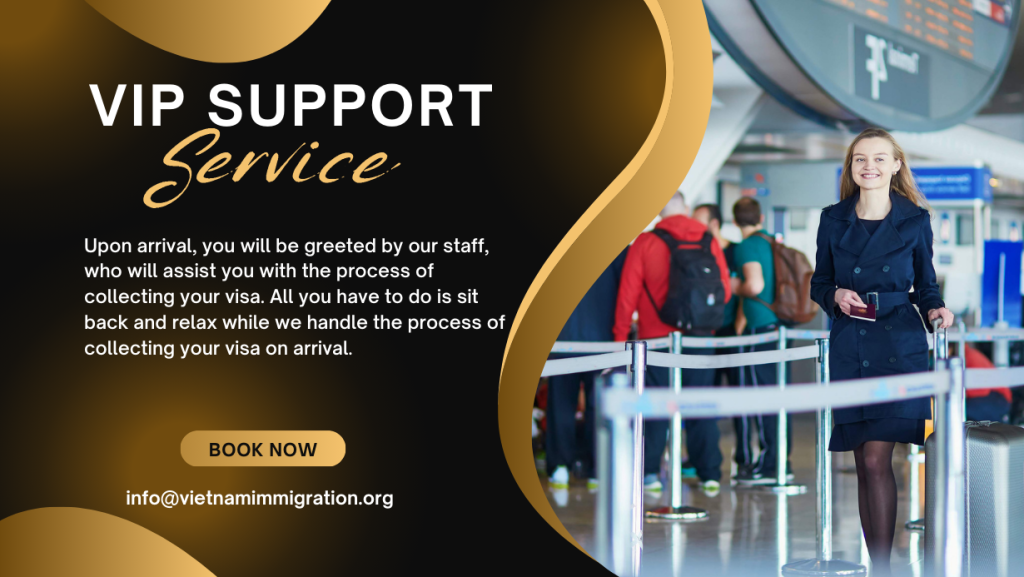
The single best way to avoid the long, tiresome queues at immigration is to use a VIP Fast Entry Service. This service is designed for savvy travelers who value their time and want to start their trip on the right foot.
Imagine stepping off the plane and seeing our agent waiting for you with a personalized sign. Instead of joining the herd shuffling towards immigration, you are personally escorted to a separate, exclusive priority lane. As you walk past the long, stagnant lines of tired travelers, you’ll clear immigration in minutes, not hours. It’s a seamless, stress-free transition that sets a positive tone for your entire trip.
For VOA holders, our service is even more comprehensive. We will take your documents and handle the entire visa stamping process for you while you relax, before whisking you through the priority immigration lane. It is the most seamless and comfortable way to arrive in Vietnam.
How to Book the Fast Entry Service to Avoid Queues at Tan Son Nhat Int’l Airport?
Booking your VIP arrival experience is simple, secure, and can be done in a few easy steps.
Step 1: Fill Out the Online Form: Provide us with your essential details, including your full name, email address, arrival date, flight number, and arrival airport (Tan Son Nhat – SGN).
Step 2: Make a Secure Payment: Complete the payment for the service. We accept PayPal, a globally trusted payment gateway. PayPal offers a robust buyer protection policy, giving you complete peace of mind and an easy way to get a refund if necessary. You can also pay with a credit or debit card through the PayPal platform.
Step 3: Receive Confirmation: After your payment is processed, you will receive a confirmation email from our team with all the details and clear instructions for your arrival. We’ll tell you exactly where our representative will be waiting for you.
Is It Safe to Book the Fast Entry Service Through Vietnamimmigration.org?
Absolutely. We understand that trust is paramount when booking travel services online. Vietnamimmigration.org is not a new or fly-by-night operation; we are an established and reputable organization dedicated to making your journey to Vietnam easier. Here are several reasons why you can book with confidence:
Over 15 Years of Experience: We have been a trusted name in the field for over a decade. The domain vietnamimmigration.org has been operational since 2008. You can verify our long history and legitimacy by checking our public record at whois.com.
100% Money-Back Guarantee: We stand by the quality of our service. We offer a full money-back guarantee, ensuring that if we do not deliver on our promise, you do not lose your money. You can read our full refund policy here.
Secure Payments with Buyer Protection: Your financial security is a top priority. By using PayPal, you are protected by their comprehensive Buyer Protection policy. This ensures your transaction is safe and secure.
Verified Customer Reviews: Don’t just take our word for it. See what hundreds of satisfied customers have to say about their experience with our services on independent review platforms like Sitejabber.
Data Privacy Commitment: We use encrypted systems and strictly comply with all data protection laws. We guarantee that your personal information will never be sold or used for marketing purposes.
Additional Tips for a Smooth Arrival in Tan Son Nhat Int’l Airport
Get a Local SIM Card:
After exiting customs, you’ll see several kiosks selling Vietnamese SIM cards in the arrival hall. Getting one is highly recommended for affordable data access, which is invaluable for using maps and ride-hailing apps. Major providers are Viettel, Vinaphone, and Mobifone.
Currency Exchange:
While you can exchange money at the airport, the rates are often slightly less favorable than in the city. Exchange only a small amount that you’ll need for immediate expenses like a taxi or a drink, and then find a better rate at a gold shop or bank in the city center.
Transportation:
Ride-Hailing Apps: Grab is the go-to app here and is generally cheaper than taxis. Once you have your luggage, book your car via the app and head outside. The official Grab pick-up area is in Lane D of the outdoor parking area. Be aware of people who may approach you asking if you are waiting for a Grab; only get into the car that matches the license plate and driver details shown in your app.
Taxis: If you prefer a traditional taxi, use reputable companies like Mai Linh (green) or Vinasun (white). Insist that the driver uses the meter.
Airport Bus: For budget travelers, there are public buses that go from the airport to the city center for a very low price.
By preparing in advance and choosing to use a Fast Entry at Tan Son Nhat Int’l Airport service, you can transform a potentially stressful airport arrival into a smooth, swift, and pleasant beginning to your incredible Vietnamese adventure.
Infographic: Navigating Tan Son Nhat (SGN) Airport Start Your Vietnam Trip Faster An insider’s guide to navigating Tan Son Nhat (SGN) airport and bypassing the infamous queues. Your Arrival Path The steps for entering Vietnam depend on your visa type.
SGN Airport Arrival Guide Arrive at SGN Stress-Free Navigate Tan Son Nhat (SGN) airport like a VIP. This guide shows you the standard process and the fast-track solution to start your Vietnam adventure without the long queues.
Tan Son Nhat Airport is Vietnam’s busiest international gateway, handling over 40 million passengers annually. Crowds and delays are inevitable, especially at two critical points: Pro Tip: Booking a Tan Son Nhat Airport Fast-Track on Arrival service ensures a staff member meets you at the jet bridge, escorts you through VIP lanes, and handles paperwork.
First, fill out the visa application form and pay the processing fee with your card. Review the details you have entered and make sure they are correct.
It’s now so easy for most foreign visitors to get a visa to Vietnam. And if you’re going to Ho Chi Minh City, you can take advantage of the Vietnam Landing Visa.
The Tan Son Nhat Airport is the main airport in Ho Chi Minh City, formerly called Saigon. This airport is considered the busiest airport in Vietnam, serving thousands of travelers every single day.
If you’ve been to Vietnam before, then you’re probably aware that its airports are often very busy. This is especially true for Tan Son Nhat Airport, the airport that serves Ho Chi Minh and the southern area of Vietnam.